Dumawall Plus tiles are a fantastic choice if you're looking to give your walls a fresh and stylish makeover that's also waterproof. These tiles fit perfectly and have superior water resistance, so not only do they enhance the look of your walls, but they also provide long-lasting protection.
But how do you install these tiles? Read on to find out simple steps together to ensure a smooth and successful installation process.
Disclaimer: Important Information to Consider
Before you begin your exciting journey of installing Dumawall Plus tiles, it's essential to understand some key points that can impact your experience and the coverage of your warranty.
- Follow Instructions Carefully: The extent of your warranty coverage is contingent upon meticulous adherence to the installation instructions. Disregarding these instructions may potentially invalidate your warranty. By diligently following these steps, you guarantee optimal outcomes and the comprehensive protection of your warranty.
- Good Faith: The information provided here is offered in good faith and reflects our current knowledge. This guidance is designed to assist you in achieving the best possible outcome with our products.
- Prioritize Your Safety: Your safety is our priority. When installing the tiles, make sure to equip yourself with safety goggles, a mask, gloves, and steel-toe boots. Also, work in a well-ventilated area. Your well-being matters to us.
|
PRO TIP: To ensure a consistent and uniform look, it is crucial to use tiles from the same batch for the entire installation. This will not only guarantee consistency in terms of appearance but also ensure harmonious colour coordination throughout the project, creating a visually pleasing and cohesive result. |
Important Things to Consider Before You Start Installing Dumawall Tiles
Where You Can Put Up Dumawall Tiles
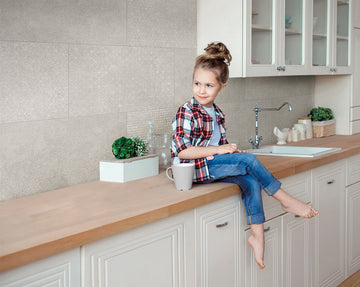
Dumawall Plus tiles are like chameleons – they fit in almost anywhere! You can use them to upgrade the walls in:
- Private Residences: Transform your bathroom, kitchen, laundry room, garage, basement, bedroom, living room, and more.
- Professional Spaces: Give your office, sports halls, shop areas, and other workspaces a fresh new look.
- Prefab Houses, Caravans, and Boats: Even your home away from home can benefit from these tiles.
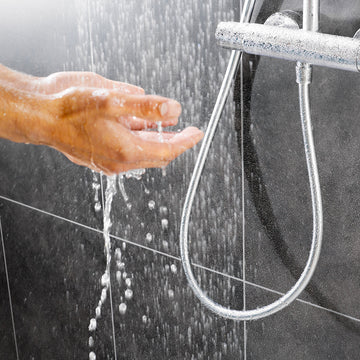
Damp Areas? No Problem!
These tiles are like superheroes when it comes to damp areas. Bathrooms and places with a bit of moisture won't scare them away. They're specially designed to handle these kinds of spaces like pros.
Places to Avoid
While Dumawall Plus tiles are super versatile, there are a few places where they're not quite the right fit. Make sure you don't install them in:
- Outdoor Spaces: Putting these tiles outside isn't a good idea. They might change colour and become brittle when exposed to the elements.
- Extreme Temperatures: Avoid areas where it gets hotter than 60°C (140°F) or colder than -10°C (14°F). So, no saunas or refrigerated rooms.
- Poorly Ventilated Areas: Tiles need some fresh air. Don't install them in places with bad ventilation.
- High Sulfur Zones: Stay away from areas with a lot of sulfur (H2S). These tiles aren't fans of that stuff.
Tools You'll Need
- Fine Tooth Saw or Jigsaw: A fine tooth saw, preferably with 14 teeth per inch, or a jigsaw, is necessary for cutting the tiles to the right size. These tools ensure a clean and precise cut which is crucial for a neat installation.
- Stanley Knife: A Stanley knife is handy for making smaller, more detailed cuts on your tiles. This tool allows for greater precision and control.
- Tape Measure: A tape measure is essential for accurately measuring your wall and the tiles. It ensures that the tiles fit perfectly onto the wall.
- Skeleton Gun: A skeleton gun applies the adhesive and silicone. It allows for an even distribution of these materials, ensuring a firm and secure fit for the tiles.
- Adhesive (Solvent-free): It's crucial to use a solvent-free adhesive when installing Dumawall Plus tiles. The adhesive binds the tiles to the wall, and the solvent-free variety ensures a strong bond without damaging the tiles.
- Silicone: Silicone is used to seal the edges of the tiles. It prevents moisture from seeping behind the tiles, thereby increasing their lifespan.
- Pins, Staples or Screws: These are used in the fastener installation method. Depending on your preference, you can use pins, staples, or screws to secure the tiles to the wall.
- Spirit Level: A spirit level is an important tool to ensure that your tiles are perfectly aligned and straight. This tool is especially useful when you're installing tiles over a large area.
- Pencil: A pencil is indispensable when marking out the precise placement of tiles before installation. Despite its simplicity, this humble tool plays a crucial role in achieving a successful and impeccably neat tile installation.
How to Install Your Dumawall Tiles
Prepare Your Space
For an uneven or damaged base:
- Attach a robust support frame to ensure a level surface.
- Utilize wooden or plastic latticework as the supporting structure.
- Install the supports perpendicular to the direction of the tiles.
- Maintain a maximum distance of 30 cm between the supports.
- Incorporate open spaces within the framework behind the tiles to facilitate air circulation.

For an even base:
- You can use a simple silicon adhesive without the need for a framework.
- The Dumawall+ tiles can be directly glued onto existing tiles.
- Make sure the surface is dry and free from dust and grease.
- Degrease the back of the tiles, such as using isopropyl alcohol.
- Apply the adhesive in a zigzag pattern onto either the tile or the base.
- Opt for an MS-polymer-based adhesive or a two-component polyurethane adhesive.
|
Hot TIP: Dumawall+ tiles may expand and contract with temperature changes. To be a good host, leave extra space on each side of the tiled surface - about 1mm per meter of Dumawall+ should do the trick. For example, if your wall length is 5m, allow for a 5mm gap at each side of the wall that is to be tiled. It's a tiny detail that can make a huge difference. |
Step-by-Step Installation of Dumawall+ Tiles
Step 1: Cutting the Tiles
Your Dumawall+ tiles can easily be cut or shortened using a handsaw, table saw, portable circular saw, or cutting saw. But remember, sharp tools are no joke, so take all the necessary precautions. Safety glasses and gloves are always a good shout!
Step 2: Placing the First Tile
Now, let's get down to business. Grab your first tile and place it with side "A" facing to the right. It's like setting up dominos, but way more satisfying.

Step 3: Fixing the Tile
Alrighty, it's time to fix the tile in place. You've got two options here:
- Option A: Nail it onto a frame using the little tab at the top. To make sure the next row fits perfectly, ensure that the nail is completely flush with the tab.
- Option B: Stick it onto a smooth surface using a simple (silicone) adhesive.

Step 4: Connecting the Next Tile
Next up, connect another tile along the cross-cut side "B". Make sure you FULLY insert the tab into the groove. It's a bit like putting together a jigsaw puzzle – every piece should fit perfectly.
Step 5: Completing the Row
Keep going until you've created a full row of tiles. Cut the tile to size at the end of the row. And don't worry if you've got a piece left over – we'll use that in a bit.

Step 6: Securing the First Row
Now, here's a nifty tip: you can screw the first row of tiles at the bottom. This part will be covered by the base later on, so no one will ever know.

Step 7: Starting the Next Row
Remember that leftover piece from earlier? If it's at least 30 cm long, you can use it to start the next row. You can choose to install the tile effect in correlation (A) or parallel (B). The world is your oyster... or rather, your wall is your canvas.
 |
 |
Step 8: Completing the Installation
You're nearly there! Keep adding row upon row until your wall is completely covered. You can place the tiles vertically or horizontally – whatever floats your boat!
Step 9: Waterproofing (for Very Damp Areas)
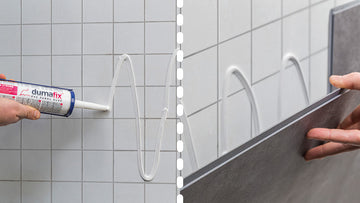
If you're installing the tiles in a shower area, around a bath, or any other very damp place, here's an important step: always add a silicone line in the connection between the tiles themselves and between the tiles and support trims. This ensures a completely waterproof joint. Also, apply a silicone line between the tile and the edge of the shower or bath.
|
Just a heads up: Dumaplast guarantees that the tiles themselves are waterproof, but waterproofing each joint is your responsibility as the installer. So, make sure you do it properly to avoid any potential water damage. |
Finishing Touches and Care
Have Accessories to hang? Drill Wall or Tile
Don't attach heavy items like mirrors or coat hooks directly to your Dumawall+ tiles. Instead, drill holes and use screws and plugs for a secure attachment to the wall behind the tiles.

Cleaning
Maintain your tiles with ordinary household products. A soft, non-abrasive cleaning agent or a damp cloth usually does the trick. Avoid using abrasives and chloride-based cleaning products.
Disposal
When it's time to replace your tiles, remember they're 100% recyclable and made from eco-friendly PVC. Dispose of responsibility to keep our planet beautiful.
Wrapping It Up
We hope this step-by-step guide has helped you gain the confidence to install your Dumawall+ tiles like a pro! These robust and watertight wall tiles create an utterly modern look for any interior space. And with all these safety, installation, and maintenance tips in hand, you're now ready to bring your vision to life. Go ahead - turn that boring wall into a beauty.
If you want to check the variety of colours and styles Dumawall+ offers, head over to our homepage